|
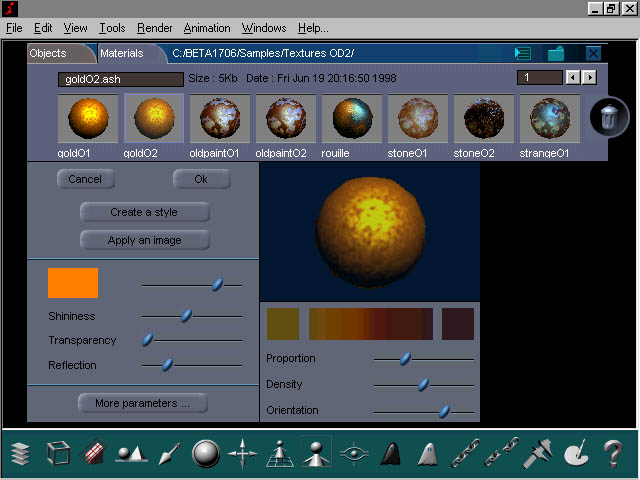
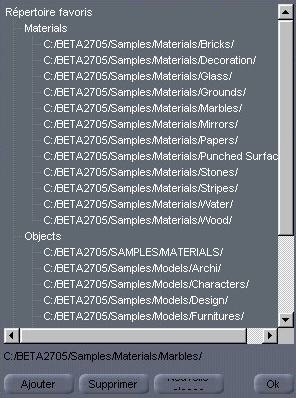
The textures editor is shown here in its basic version. If you click onthe "More parameters..." button, you will get some more setting options. For this Tutorial, we will focus on the basics. To discover a function, click on the corresponding button or picture. If you want to see some examples, just click here. You can edit and rename it, and save it where you want. Come back to the Texture editor The Preview Window shows how the texture will look on the object that was selected when you started the Texture Editor. For scan-line shader settings, you can stop the renderer with the ESC key, and re-render with the ENTER key. The preview window is full 3D, just as the main Amapi window. Come back to the Texture editor Apply Textures All pre-made textures and shaders are shown in the Tab-folder. Just drag & drop to use them. Come back to the Texture editor A new feature for Amapi 3D, these can provide some very cool and unique visual results. You can adjust each parameter (color, thickness...). Use your own models to create a cartoon! To see some examples see the small gallery. Come back to the Texture editor You can edit and modify each texture. More on this is in the User Guide. Come back to the Texture editor You can map a bitmap file on your object! Different modes are available: plan, sphere, cylinder, cube... You can adjust the image size, the tiling, if needed. The picture can be used to make a bump mapping, transparencies, etc. Numerous file formats can be imporded: JPEG, TGA, BMP and more. Come back to the Texture editor If you click on this icon, this window will show you the folder list you had choosen. Your objects and textures are, like this, easily managed
Come back to the Texture editor |